The front of the cards can be designed in red, white, and blue colors by adding the American flag and patriotic designs. They need to carry a celebratory and an appreciating tone to show patriotic feelings. In addition to that the inclination of the card should be provided with the celebration day of Independence Day.
Steps to Design An Independence Day Card
Step 1: Provide the Leading Idea and the Theme
Before getting into the design of a complementing Independence Day card, make sure that you know which atmosphere and theme you would like to create with this design. Traditional is the kind of design you want to go for, or are you more likely to explore a more unique, modern, and artistic approach? Come up with general style, colors, and graphics that look like a unit with your brand IQ.
Step 2: Pick And Make Use Of The Right Tools
In the second stage, consolidate the required design tools and resources to enable realizing your visualization. It doesn‘t matter whether you prefer to remain in the creative mode or need user-friendly online tools, one way or another you are welcome to use digital or analog ones at your taste.
Always remember that searching for tutorials and designing templates are great sources of inspiration and instruction, therefore use them during your creation if you need to.
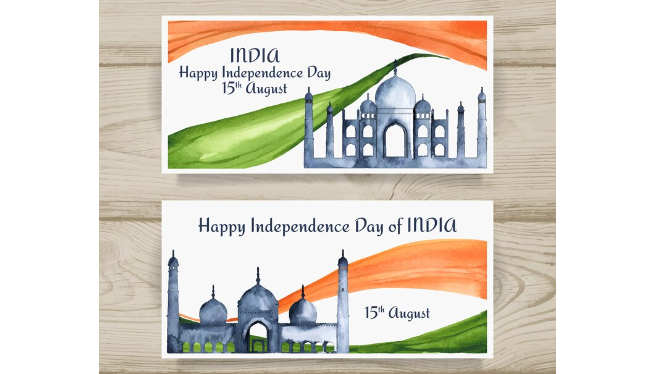
Step 3: Select High Quality Graphics and Images for your Online Course
Achieving an aesthetically pleasant Independence Day card in terms of visual effects is dependent upon choosing first-class graphics and photos. Symbols of patriotism are the key to the creation of the mood of liberation and unison. Hence, look for patriotic signs like flags, eagles, fireworks, and stars.
Endeavor to use the most recognizable place, the most prominent character, or the most proverbial stories which represent the main realization of the Independence Day celebrations and at the same time add recognition and profundity to your design.
Step 4: Your Card Layout can be Designed
Now it’s your turn to add color and fun to the layout of your Independence Day greeting card. Learn how to make well-composed, organized, and type-friendly aesthetic elements to make your design unified and relevant on Adobe Express Independence Day card design.
Make sure you are vigilant on the key matters like balance, alignment, and spacing to avoid your message and photos not being converted into pictures. Never hesitate when designing anything; fonts, colors, and textures play an important role in giving away the personality and flair of your card.
Step 5: Add Some Appealing Catchy Lines and Sayings
Instill a genuine glimpse of the national holiday into your Independence Day card with words that could be wordings of some statements, quotes, poetry, or sentiments that carry a glimmer of the national day in sight.
Our national holiday could be marked by a message of gratitude for life, freedom, and liberty through which we rejoice and show patriotism through appropriate quotations from a founding father or may simply wish “Happy Independence Day” but it should do so using sincerity and warmth. Particularly, make the message more personalized so that you convey nostalgia through the intimate connection you share and the importance of the moment.
Step 6: Explore The Opportunity Of Digitizing Components (Optional)
To rack up the effects of creative and interactive design, you may put together some interactive elements in the card that show your pride on Independence Day. It is possible that one could do that through pop-up features, certain interactive flaps or tabs, or QR codes that then lead to digital content or even multimedia experiences.
Apart from the visual experience, the interactive elements will facilitate meaningful participation leading to a sensory experience for the recipient.
Step 7: Read and Write Over
Your final card should not be agreed upon before you check, so you should review and correct your creation. Ensure that everything is spelled and grammatically correct, all elements are centered or justified depending on the style guide used, and that the design aligns with the message and the aesthetic you are aiming to portray. Solicit feedback from friends, family, or colleagues around to illustrate new approaches and pin out zones in need of development,
Step 8: Make Your Printed Cards and Assemble Them
You must be content with your card design and then print and assemble it which comes to life as you are done. Make purposeful paper stock and printing selections that not only elevate the overall appearance of your stationery but also maximize strength.
It is important to carefully select the card style that you want – flat cards, folded cards, or even postcards are good alternatives – and make sure the print process exactly recreates the colors.
Step 9: To Personalize And Get Your “Cards” Ready For Sending
To boost personalization, write each recipient’s name and if possible, write a note inside the Independence Day cards whenever possible. Handwritten notes convey a personal message and create the recipient’s sense of uniqueness and the one who is loved or acknowledged.
Consider envelopes, gift bags, or other decorative packaging that will be used to spice up the appearance of your cards and make them attractive to the recipients. They cannot help but notice the uniquely wrapped card in the mailbox.
Step 10: Add Patriotic Touch
In the final step to disseminate patriotism and joy to various groups, go ahead and mail a few of the Independence Day cards to friends, relatives, neighbors, and even colleagues in the community. Regardless of whether your mail them earlier or hand deliver them during the event itself, your personalized card is certainly going to make your recipient shocked and awe at the giftedness of your creativity.